How to Navigate Qooper?
You are encouraged to meet with your connection periodically.
Steps under your Program Guide on the Homepage will provide meeting topics and activities.
By scheduling your mentorship meetings in Qooper and tagging the meeting topic, you will get credit for completing your program.
You may be asked to set goals, join groups to network, and review learning resources.
How to Create a Meeting on Qooper?
- Select the "Mentoring" tab on the top bar.
- Choose the connection with whom you want to set up a meeting.
- On your connection's profile page, find the "Meetings" tab
- Click on the "Schedule a Meeting" button
To schedule a meeting, complete the fields in the dropdown form;
- Enter the meeting title.
- Select the date, duration of the meeting, and start time.
- Add your video call link. (Zoom, Google Meet, and Others)
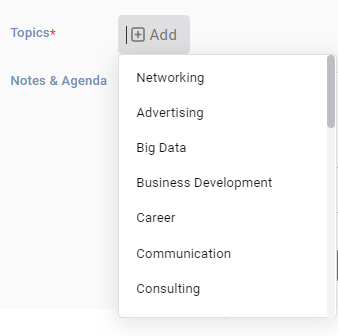
- Pick your meeting topic from the Topics section dropdown menu by clicking on the "+Add" button.
- You can type down your notes under the "Notes & Agendas" section *Optional
- After completing the form, click the "Submit" button to schedule a meeting.
Important note on scheduling In-Person Meeting: You can schedule an in-person meeting by choosing "In-Person" as the meeting type and choosing your location from the "location" field. (your area will appear in the dropdown after you type it, please pick it from the list)
Now your meeting is created. Your connection will receive an email notification. You can add your meeting to your Google Calendar, Outlook Calendar, or Apple Calendar.
What are the badges?
The badges provide guidance and increase engagement in the program to create a structured mentoring and learning experience.
There are three badges in total, Achiever, Mentoring, and Learner. Each badge has specific requirements to be completed.
How do I track my progress?
Users can see their progress and requirements related to the relevant badge by clicking "View Progress" under Achiever, Mentoring, or Learning Badge, as shown in the picture below.

How and where to add a tag?
You are required to add one/more topics when you:
- Give feedback to your mentor
- Set a meeting
- Set a goal
- Share a learning
- Posting a group discussion
You can choose your topic from the dropdown menu, as shown in the picture below.

How to add availability in Qooper?
- Find the "profile" under the profile dropdown menu on the top right and click on it.
- You will see the "Availability" tab located under your profile picture
- Click "Add New" to set your availability date
- Choose your date, time and select whether the calendar availability should be repeated (weekly, biweekly, and monthly)
How can mentors control how many connections they have?
- Sign in to your mentor account on the Qooper web platform.
- Find the "profile" under the profile dropdown menu on the top right and click on it.
- Click on the "Availability" tab under your profile
- Now you can enter the number of connections you will accept under the "Connection Limit" and click on the "Submit" button.
How to add a monthly meeting limit?
- Find the "profile" under the profile dropdown menu on the top right and click on it.
- On your profile page, find the "Availability" tab and click on it
- Find the "monthly meeting limit" section
- Enter the max number of meeting requests you would like to receive for each month, and then click on the submit
What to do if you forget your password?
- Go to mentoring.qooper.io
- Enter your email address and click Submit.
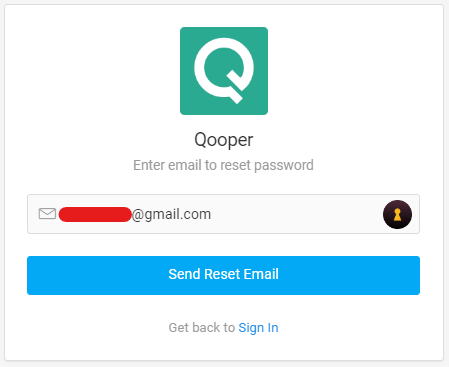
- Click on the "Forgot Password" button below.
- Type down your email and click on the" send reset email" button
- Follow the instructions on the reset email

How to update your email?
- Log in to your account.
- Find the "profile" under the profile dropdown menu on the top right and click on it.
- On your profile page, find the "Account" tab and click on it
- In the Account tab, see the "Change email address" section
- Enter your new email and current password to change your email address.
What to do if you sign up for the wrong role?
- Log in to your account.
- Find the "profile" under the profile dropdown menu on the top right and click on it.
- On your profile page, find the "Account" tab and click on it
- In the Account tab, see the "Delete Account" section
- Enter your password to delete your account.
Please note that your data is going to be deleted completely. Deleting your account will remove you from all the programs you have joined.
